How to Make a Classic Omelet Without Browning It (7 Pro Tips)
I still remember the first time I tried to make a classic French omelet. I had watched a dozen videos, felt supremely confident, and cracked three beautiful eggs into a bowl. Ten minutes later, I was staring at a golden-brown, slightly crispy disc that tasted fine but looked nothing like the pale, custardy perfection I'd aimed for. The culprit? I had cranked the heat too high and walked away for thirty seconds. That one mistake taught me more about heat control than any recipe ever could. What I've learned since—through countless Sunday mornings and a few spectacular failures—is that mastering a classic omelet without browning it isn't about fancy gear or secret ingredients. It's about understanding a handful of counter-intuitive techniques that go against everything we think we know about cooking eggs. If you've ever pulled a spotty, overdone omelet from the pan and wondered where you went wrong, the seven pro tips below will change your breakfast game permanently.
Why a Pale, Tender Omelet Is the Mark of a Pro
The first thing any line cook learns about eggs is that heat is a liar. It tells you things are done when they're not, and it sneaks browning into your pan long before you notice the color shift. A classic French omelet isn't just an omelet—it's a test. Walk into any serious kitchen and ask for an omelet during a stage, and the chef isn't checking if you can cook an egg. They're checking if you can control yourself.
What separates a pale omelet from the browned diner-style version most of us grew up with comes down to intention. A browned omelet develops flavor through the Maillard reaction—that complex chemical dance between amino acids and reducing sugars that gives seared steak its crust and toast its nuttiness. But in a classic French omelet, browning is considered a defect, not a feature. The goal is a tender, almost custard-like interior with a smooth, unblemished exterior that's barely set. You're aiming for coagulation without caramelization, and that's a much narrower window than most home cooks realize.
I've served pale omelets to friends who initially looked skeptical—no golden edges? No crispy bits?—and then watched their expressions change after the first bite. The texture is what wins people over. Without browning, the egg proteins stay relaxed and tender rather than tightening into a rubbery matrix. The mouthfeel is creamy, almost sauce-like at the center, even without adding cream or milk. That's the benchmark. Once you taste it, the browned version starts to feel like a compromise.
Understanding this distinction matters because it reshapes how you approach the entire cooking process. You stop treating the pan like a griddle and start treating it like a gentle bath. Every decision—from the butter you choose to the way you stir—flows from that single objective: keep it pale.
The Science of Low and Slow: Tempering Your Heat
If there's one variable that determines whether your omelet emerges ivory or spotted brown, it's pan temperature. Egg proteins begin to coagulate around 144°F (62°C) and finish setting by about 180°F (82°C). The Maillard reaction, which creates browning, doesn't kick in meaningfully until surface temperatures climb above 285°F (140°C). That gap—over a hundred degrees—is your safety zone. The trick is keeping the pan firmly in the coagulation range without ever drifting into browning territory.
Most home stoves fight you on this. Even on the lowest setting, many gas and electric burners can push a thin pan well past 300°F if given enough time. I learned this the hard way on an old apartment stove that had two settings: off and inferno. The solution wasn't a better stove—it was a different relationship with the knob. I started preheating the pan on medium-low, adding butter, and then pulling the pan off the heat entirely for a few seconds whenever the butter started to sizzle aggressively. That intermittent heating technique—on and off the burner in short cycles—gave me control that no single dial position ever could.
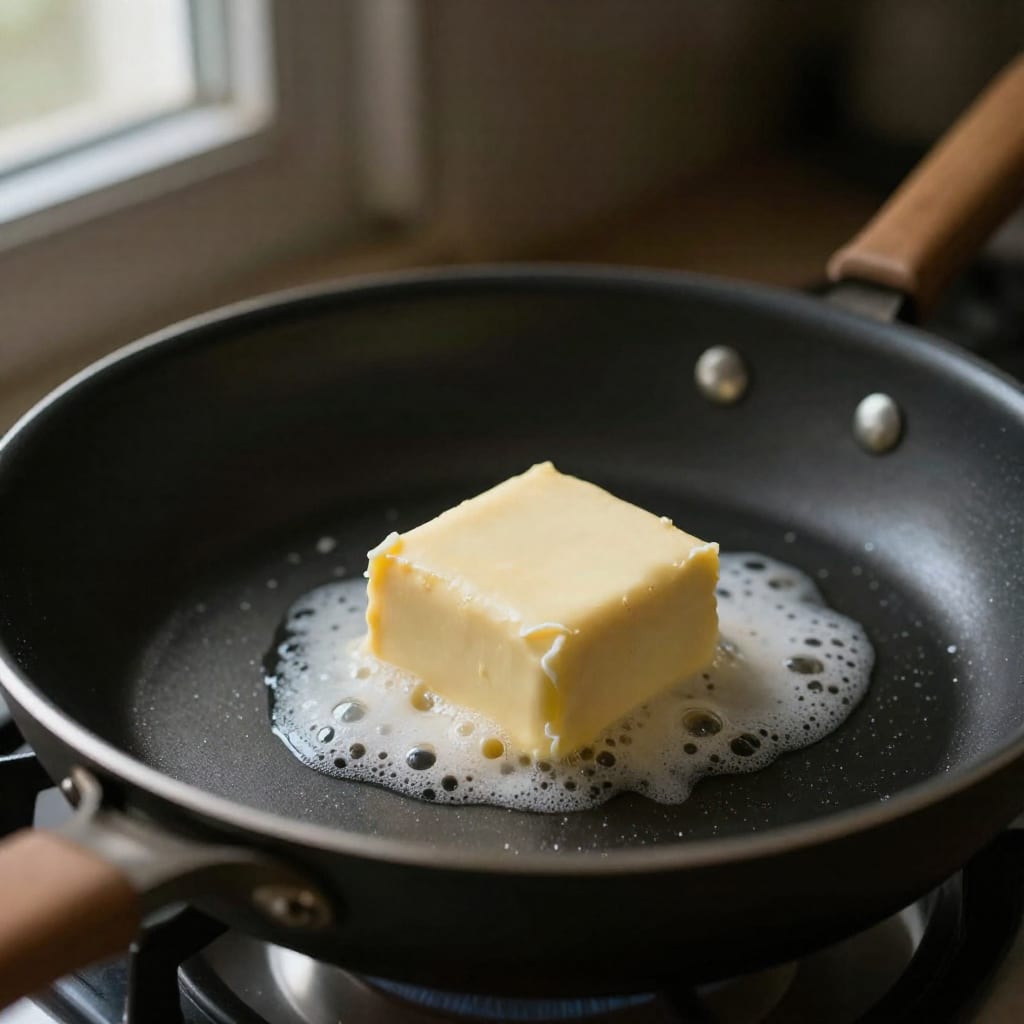
Here's a concrete example from my own setup. I use an 8-inch non-stick pan on a gas range. I set the flame to the lowest setting that still produces a steady blue ring, which on my stove is roughly a quarter-inch flame. I let the pan warm for two minutes, then add a tablespoon of cold butter. If the butter melts slowly over about 15 seconds without foaming or browning, I know I'm in the right zone—somewhere between 200°F and 250°F. If it sizzles and browns within five seconds, the pan is too hot and I pull it off, wipe it with a paper towel, and start again. That butter test has saved more omelets than any timer or infrared thermometer ever could.
Another factor that doesn't get enough attention is pan thickness and material. Thin stainless steel pans create hot spots that scorch eggs in one area while leaving another undercooked. A heavy-gauge non-stick or well-seasoned carbon steel pan distributes heat more evenly, which means you're not constantly chasing hot spots with your spatula. I've used the same inexpensive non-stick pan for three years now, and the only reason it works is that I treat it gently and never let it overheat.
Butter, Eggs, and Timing: Ingredient Prep That Prevents Color
Ingredients seem like the least interesting part of the omelet equation, but they set the stage for everything that follows. Cold eggs dropped into a hot pan seize up immediately, creating a dense, rubbery layer that browns before the rest of the mixture has a chance to cook. Room-temperature eggs, on the other hand, hit the pan relaxed and spread evenly, cooking more uniformly and reducing the risk of hot spots that scorch.
I pull my eggs from the fridge at least 20 minutes before I start cooking—longer in winter when my kitchen runs cold. If I forget, I'll submerge them in a bowl of warm (not hot) water for five minutes. It's a small step that pays off in texture. The yolks and whites blend more smoothly at room temperature too, which means fewer streaks of white that can overcook and brown before the rest of the omelet sets.
Butter does double duty here. It's not just a non-stick agent; it's a temperature buffer. A generous pat—I use a full tablespoon for a three-egg omelet—coats the pan and creates a thin layer of fat that insulates the eggs from direct metal contact. That buffer zone is what lets you stir and agitate the eggs without them sticking or scorching. Clarified butter works even better because the milk solids have been removed, which raises the smoke point slightly and eliminates the risk of those solids burning and leaving brown specks on your omelet. But honestly, I use regular unsalted butter 90% of the time and just keep the heat low enough that it never browns.
One counter-intuitive insight I've landed on after years of experimenting: adding a splash of water to the beaten eggs—not milk or cream—actually helps keep the omelet tender without promoting browning. Milk and cream contain sugars and proteins that can caramelize. Water, about a teaspoon per two eggs, creates steam as it cooks, which gently lifts and aerates the egg mixture, giving you that delicate, almost soufflé-like texture without any risk of added color. I picked up this trick from an old Jacques Pépin video and it's been a staple ever since.
7 Pro Tips for a Perfectly Pale, Silky Omelet
The techniques below aren't theoretical. They're the distillation of every mistake I've made and every adjustment that actually moved the needle. Some of them will feel wrong the first time you try them—especially the stirring part—but trust the process.
1. Beat the eggs just until uniform, not frothy. Over-whisking incorporates too much air, which creates a spongy, uneven texture that browns in patches. I use a fork and beat for maybe 15 seconds—just until the yolks and whites are fully combined and no visible streaks remain. The mixture should look smooth and slightly viscous, not bubbly on top.
2. Use more butter than feels reasonable. A tablespoon of butter for three eggs might seem excessive, but that fat layer is your insurance policy. It keeps the eggs sliding freely and buffers them from the pan's heat. I swirl the melted butter up the sides of the pan too—eggs have a way of creeping upward and sticking to the rim, where they'll brown first.
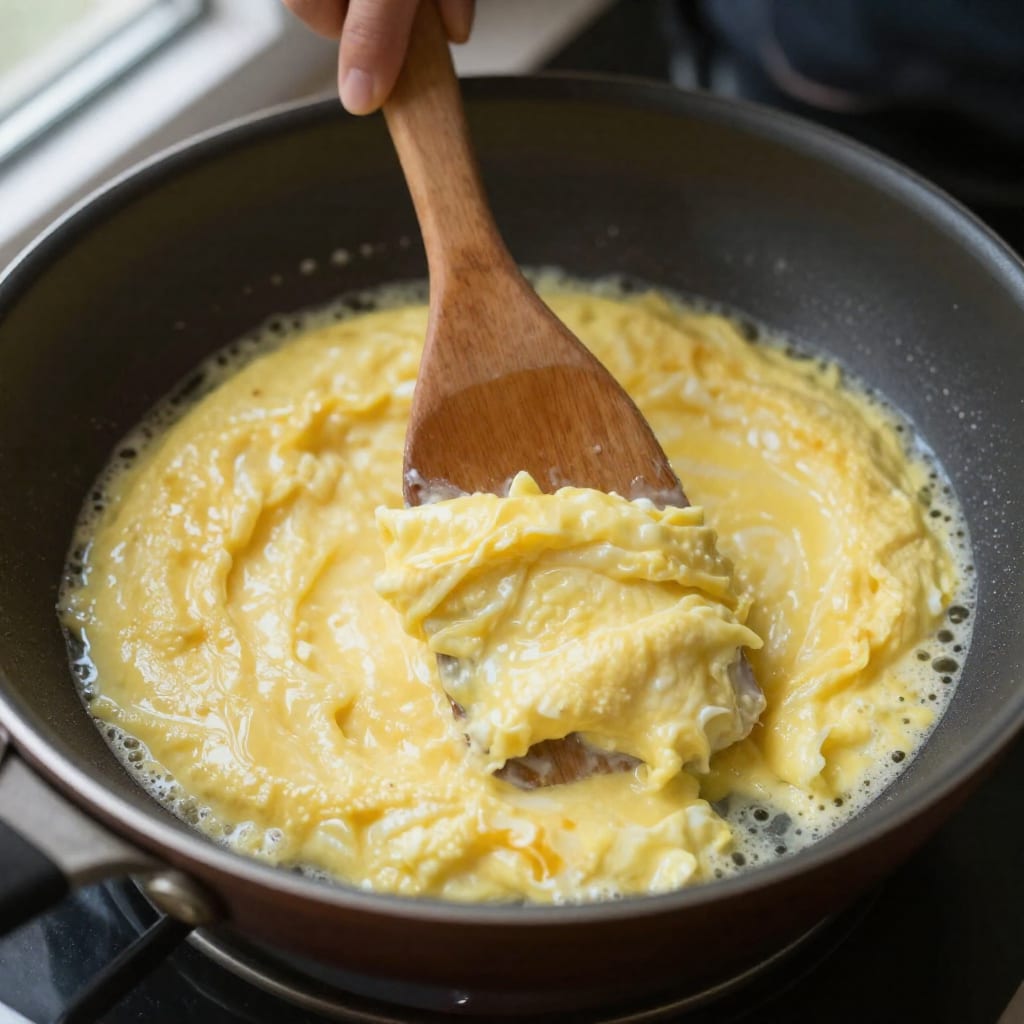
3. Stir constantly with a silicone spatula for the first 20 seconds. This is the game-changer. As soon as the eggs hit the pan, I start stirring in small, rapid circles, scraping the bottom and sides continuously. This agitates the curds, keeping them small and creamy, and prevents any one section from sitting still long enough to brown. The motion looks almost like you're making scrambled eggs, which feels wrong, but it's exactly right for a classic French omelet.
I'll never forget watching a breakfast cook at a small Paris bistro do this a decade ago. His spatula never stopped moving for the first half of the cook, and the result was an omelet so uniformly pale and tender it looked like yellow silk. I tried mimicking it at home and immediately over-stirred, breaking the curds into dry little grains. The balance—stirring enough to prevent browning but not so much that you shred the eggs—took me weeks to find. Aim for curds the size of small cottage cheese, not rice.
4. Pull the pan off the heat halfway through. About 30 seconds in, when the eggs are roughly half-set but still very wet on top, I slide the pan off the burner entirely. The residual heat in the pan is enough to finish cooking the omelet gently without adding any additional energy that could trigger browning. During this off-heat phase, I stop stirring and let the omelet settle into a cohesive shape.
5. Tilt and roll, don't flip. A classic French omelet isn't flipped—it's rolled. Once the eggs are mostly set but still glossy on top, I tilt the pan away from me at about a 45-degree angle and use the spatula to fold the upper third of the omelet down toward the center. Then I tilt the pan further and roll the omelet out onto the plate, letting the final seam seal underneath from its own heat. This gentle handling preserves the pale exterior and gives you that characteristic oval shape.
6. Season only at the end. Salt draws moisture out of eggs if added too early, which can create a watery layer that steams and browns unevenly. I beat the eggs without salt, cook them, and then finish with a pinch of flaky sea salt and fresh cracked pepper right before serving. The flavor is brighter, and the texture stays consistent throughout.
7. Wipe the pan between omelets if you're making more than one. Even a tiny residue of cooked egg or butter solids from a previous omelet will burn instantly when the pan reheats, leaving brown specks on your next attempt. I keep a folded paper towel next to the stove and give the pan a quick wipe before adding fresh butter for each new omelet. It adds ten seconds and eliminates the most common source of unwanted color in batch cooking.
Troubleshooting: What to Do When Your Omelet Starts to Brown
Even with careful technique, browning sometimes sneaks in. Maybe the phone rang, maybe the pan was hotter than you realized, or maybe you just looked away for five seconds too long. The first thing to do is not panic. A lightly browned omelet isn't ruined—it's just not a classic French omelet anymore.
If you catch browning early, while the eggs are still mostly wet, you can often salvage things by immediately pulling the pan off the heat and adding a tiny pat of cold butter. Swirl it around the edges where browning typically starts—the cold butter lowers the pan temperature rapidly and can stop the Maillard reaction in its tracks. Then finish cooking off the heat as described above.
If the bottom has already set with noticeable golden spots, lean into it. Stop stirring and let the omelet cook through as a flat round—you've essentially made a frittata-style omelet at this point. Fold it in half, plate it browned-side down, and call it a country-style omelet. It'll still taste great, and no one needs to know it wasn't Plan A. The most common mistake I see is people trying to scrape off the browned layer, which just tears the omelet apart and makes a mess. Don't fight the egg—adapt and move on.
Another frequent issue is uneven browning in patches. This almost always traces back to hot spots in the pan. If you notice the same section of your omelet browning every time, your pan is likely warped or your burner is uneven. Rotating the pan a quarter turn every 15 seconds can help distribute heat more evenly, but the long-term fix is investing in a pan with a thick, flat bottom.
Before you watch the video below, keep an eye on how the chef manages the pan temperature—notice the constant movement and the way they lift the pan off the heat without even seeming to think about it. That instinctive temperature control is what you're building toward.
In the second video, pay attention to the ingredient prep and the way room-temperature eggs behave differently in the pan—the mixture spreads more evenly and sets with a smoother surface than cold eggs ever could.
Learning to make a classic pale omelet is less about following a recipe and more about developing a feel for heat and motion. The butter test, the constant stirring, the off-heat finish—these are all tools that help you stay inside that narrow temperature window where eggs set but don't brown. Once you've done it successfully two or three times, the process becomes muscle memory. You'll start to sense when the pan is too hot just by the sound of the butter, and you'll know exactly when to stop stirring by the look of the curds. That's the real goal: not a perfect omelet once, but the confidence to make one any morning you feel like it.
Worth bookmarking before your next weekend breakfast—the butter test alone will save you more omelets than any expensive pan ever could.