5-Minute Simple Chocolate Mousse That Beats Box Mix
Last Tuesday, I stood in my kitchen at 9:14 p.m., staring down a box of instant chocolate mousse mix. The ingredient list read like a chemistry quiz: hydrogenated palm oil, corn syrup solids, artificial flavor, three different gums. I wanted real chocolate, not a whipped science experiment. I melted a bar of 70% cacao, whipped some cream, and six minutes later I was scraping a ramekin clean. That's the whole origin story for this recipe — a 5-minute simple chocolate mousse that uses four actual-food ingredients and tastes richer than any box mix ever could.
Why This 5-Minute Chocolate Mousse Beats Any Box Mix
Box-mix mousse promises convenience, but it delivers a weirdly airy, vaguely chocolate-flavored foam that needs 15 minutes of beating, then an hour of chilling before it becomes anything close to dessert. You're trading time for a list of stabilizers and powdered dairy. I've made both, and the homemade version wins on every axis: speed, flavor, and the simple fact that you know exactly what's in the bowl.
This easy chocolate mousse recipe uses heavy cream and real chocolate. That's the core. No egg whites to whip into stiff peaks, no gelatin to bloom and melt, no double boiler anxiety. If you can melt chocolate and whip cream, you can make this. The result is a dense, silky mousse that lands somewhere between a French pot de crème and the whipped mousse your grandmother might recognize — only faster. The first time I served it to friends, one asked if I'd spent the afternoon tempering chocolate. I just pointed at the microwave.
I'd argue the biggest reason this homemade chocolate mousse beats the box is mouthfeel. Box mixes rely on air whipped into reconstituted milk powder and gelatin to create structure. That structure collapses on the tongue into something thin. Heavy cream, when whipped just shy of stiff peaks and folded into melted chocolate, traps air in a matrix of butterfat. The mousse feels plush, not foamy. You get a clean chocolate finish instead of a lingering artificial aftertaste. For a dessert that takes five minutes, that's a wild upgrade.
The Secret to a 5-Minute Mousse Without Eggs or Gelatin
Most classic mousse recipes are built on a French framework: a base of egg yolks enriched with melted chocolate, lightened with whipped egg whites, and sometimes stabilized with gelatin. That process is beautiful but finicky. You're juggling temperatures to avoid scrambling yolks, whipping whites to exact peaks, and hoping the whole thing doesn't deflate. I respect the craft, but on a weeknight, I want a dessert that doesn't demand respect — just a spoon.
The trick to how to make a simple chocolate mousse that takes five minutes and skips eggs entirely is ratio and order. You need two parts heavy cream to one part chocolate by weight. The cream gets divided: roughly two-thirds gets whipped, while the remaining third stays liquid. You melt the chocolate with that unwhipped portion of cream, creating a smooth ganache-like base that's fluid enough to fold into the whipped cream without seizing. This is the lightbulb moment. If you pour straight melted chocolate into whipped cream, the temperature shock can cause the chocolate to harden into tiny flecks — that's the graininess people complain about. By thinning the chocolate with warm cream first, you equalize the temperatures and the fat contents. The mixture folds together in about 15 strokes, no gymnastics required.
I learned this the hard way. The first time I attempted a quick mousse, I melted chocolate in a bowl over simmering water, let it cool for maybe 30 seconds, and scraped it directly into a cloud of whipped cream. The chocolate seized on contact, forming a lumpy, speckled mess that tasted fine but looked like chocolate-chip concrete. A pastry chef friend later explained the cream-thinning technique, and the next batch was glossy and uniform in under three minutes. Now I never skip that step.
This method also explains why the 5 minute chocolate mousse holds its texture. Whipped cream has enough structure to stay aerated for hours but remains soft enough to spoon straight from the fridge. There's no gelatin network to turn rubbery overnight. Leftovers (if you have any) will be just as silky the next day.
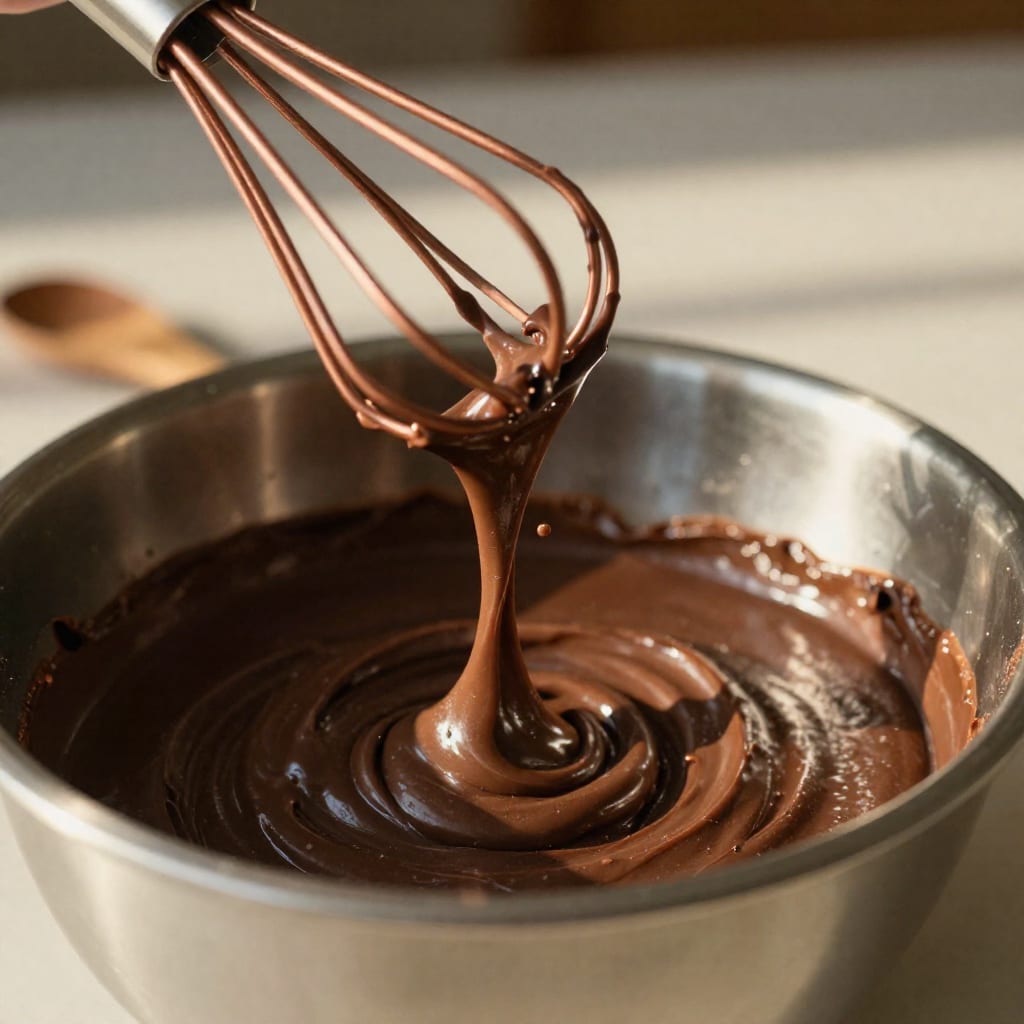
Step-by-Step: Your 5-Minute Chocolate Mousse in Action
Here's the exact recipe I use, scaled for two generous servings or four smaller tasting portions. Everything comes together in one mixing bowl and one heatproof bowl. No stand mixer required, though a hand mixer saves your arm.
Ingredients:
- 4 ounces (113 grams) dark chocolate, 60-70% cacao, chopped into small pieces
- 1 cup (240 milliliters) heavy cream, cold, divided
- 1 tablespoon granulated sugar, optional (taste your chocolate first)
- Pinch of flaky sea salt, plus more for garnish
Steps:
- Melt the chocolate with part of the cream. Combine the chopped chocolate and ⅓ cup (80 ml) of the heavy cream in a heatproof bowl. Microwave in 20-second bursts, stirring between each, until smooth — about 60 seconds total. Alternatively, set the bowl over a saucepan of barely simmering water and stir until melted. Remove from heat and let it cool for 2 minutes. The mixture should feel warm, not hot, to the touch.
- Whip the remaining cream. In a separate mixing bowl, pour the remaining ⅔ cup (160 ml) of cold heavy cream. Add the sugar if using and the pinch of salt. Whip with a hand mixer or a balloon whisk until soft to medium peaks form — the cream should hold a peak that flops over gently when you lift the whisk. Don't overwhip to stiff peaks; the mousse will finish firming as it chills.
- Lighten the chocolate mixture. Scoop a generous dollop of the whipped cream into the warm chocolate-cream mixture and stir it in vigorously. This sacrifices a little air to bring the chocolate closer to the cream's temperature and texture. The mixture will loosen noticeably.
- Fold everything together. Scrape the lightened chocolate mixture into the bowl of whipped cream. Use a flexible spatula to fold — cut through the center, scrape around the edge, fold over — rotating the bowl as you go. Stop as soon as no white streaks remain. The mousse should look glossy and voluminous, not deflated. I count roughly 12-15 folds total.
- Portion and chill (or don't). Divide the mousse into ramekins, small glasses, or espresso cups. It's ready to eat immediately as a soft, cloud-like mousse. For a firmer, more sliceable texture, refrigerate for 30 minutes. Top with a few flakes of sea salt just before serving.
Pro tip on chocolate quality: Since this simple chocolate mousse recipe has so few ingredients, the chocolate carries the whole show. I use a 70% bar from a brand that lists cocoa mass, cocoa butter, sugar, and maybe vanilla — nothing else. Avoid chocolate chips designed for baking; they contain stabilizers that prevent smooth melting. If you only have milk chocolate, reduce or skip the added sugar entirely, and know the mousse will be softer at room temperature.
Three Flavor Twists That Keep This Mousse Fresh (Without Extra Time)
One of the quiet pleasures of this recipe is how easily it shape-shifts. Box mix locks you into one flat flavor profile. Your homemade base is a canvas. Here are three variations I rotate through, none of which add more than 30 seconds to the process.
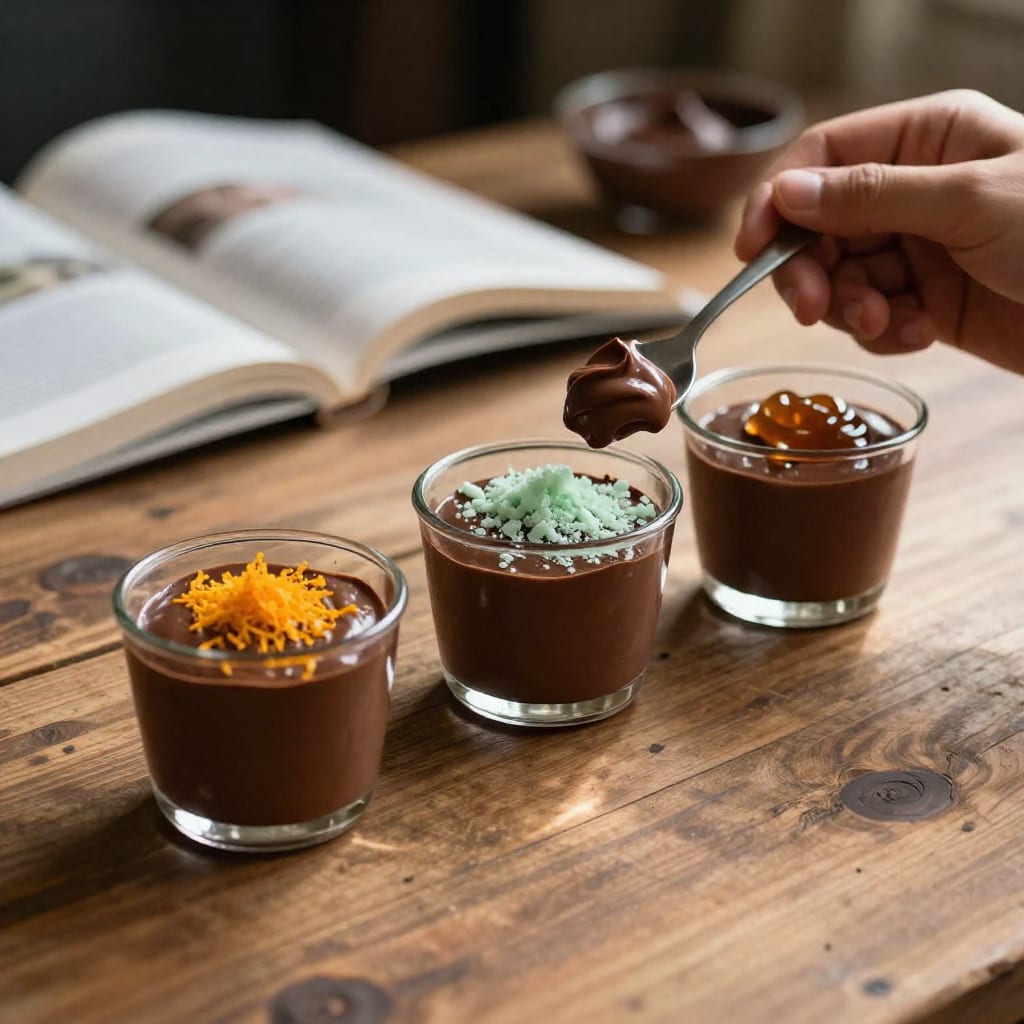
Mint-chocolate mousse. Add ¼ teaspoon pure peppermint extract (not mint flavoring) to the cream before whipping. Go easy — peppermint extract is potent, and you can always add more but can't take it out. The mousse will taste like a grown-up Thin Mint cookie. I sometimes crumble a chocolate wafer on top for crunch.
Orange-chocolate mousse. Stir the finely grated zest of half an orange into the chocolate and cream mixture as it melts. The heat releases the citrus oils into the fat, infusing the whole mousse with a subtle, perfumed orange note. Avoid orange extract if you can; fresh zest tastes brighter and lacks the artificial edge.
Salted caramel swirl. After portioning the mousse into serving dishes, dollop a half-teaspoon of good-quality dulce de leche or thick caramel sauce onto the center of each. Use a toothpick to swirl it gently into the top layer. The salty-sweet ribbons break up the richness and make each spoonful a little different. This is the version I bring to dinner parties because it looks far more effortful than it is.
Each twist uses common fridge or pantry items, so you're never stuck if a craving hits. I've also experimented with a pinch of cinnamon and cayenne (Mexican hot chocolate vibes) and a teaspoon of instant espresso powder dissolved in the cream. The point is: this chocolate mousse variations playbook rewards experimentation without risk.
Why This Beats Box Mix Every Time (Taste, Ingredients, Effort)
I keep coming back to this comparison because it's where the recipe's value really shows. Let's break it down honestly.
Ingredient quality. Box mix's first ingredient is usually sugar, followed by hydrogenated vegetable oil, modified cornstarch, and artificial flavor. My recipe starts with heavy cream — real dairy fat — and dark chocolate. That's it. No preservatives, no gums, no powdered milk solids. If you care about eating closer to the source, the choice is obvious.
Time. Box-mix instructions typically demand 5-10 minutes of beating with an electric mixer, followed by at least an hour of refrigeration. My homemade version takes 5 minutes of active work and tastes finished the moment you fold it. Yes, it benefits from 30 minutes in the fridge, but you don't have to wait. You can eat warm, soft mousse straight from the spatula while the dishes soak — I've done it.
Taste and customization. Box mix gives you one-note chocolate. Homemade gives you control over cacao percentage, sweetness level, and flavor infusions. You can't stir orange zest into a powder and expect it to bloom. You can't add a pinch of sea salt to a bowl of reconstituted foam and get the same effect. Once you taste the difference side by side, the box version registers as candy coating, not real dessert.
There's also a quiet satisfaction in knowing you made something from actual ingredients. My nephew, who's eight, helped me melt the chocolate last month and kept saying, "That's all?" as we folded the cream. He now requests "the real mousse" whenever he visits. That's a better review than any box mix has ever earned.
Frequently Asked Questions
Can I use milk chocolate instead of dark chocolate for this simple chocolate mousse?
Yes, but adjust the sugar. Milk chocolate is significantly sweeter than dark, so omit the tablespoon of granulated sugar entirely. The mousse will also be softer at room temperature because milk chocolate contains less cocoa butter. Chill it for at least 45 minutes before serving to help it firm up. Stick with a high-quality milk chocolate (35-40% cacao) for the best flavor.
How long does this 5-minute chocolate mousse need to chill before serving?
It's designed to be eaten immediately if you're in a rush — the texture will be airy and soft, almost like a whipped chocolate cream. For a firmer, more traditional mousse consistency, 30 minutes in the fridge does the trick. You can make it a day ahead and refrigerate covered; the texture stays silky without weeping.
Is this simple chocolate mousse gluten-free?
Yes, the base recipe is naturally gluten-free. Heavy cream and pure chocolate contain no gluten. Always check your chocolate label for additives or barley malt (rare in dark chocolate but worth verifying). If you add mix-ins like cookie crumbles or wafer sticks, those may introduce gluten.
Can I make this chocolate mousse dairy-free?
Absolutely. Substitute the heavy cream with full-fat coconut cream from a can that has been chilled overnight — scoop the solid cream off the top and discard the watery liquid. Use a dairy-free dark chocolate (many 70% bars are naturally dairy-free). The texture will be slightly denser and the coconut flavor mild but pleasant with chocolate.
Why is my homemade chocolate mousse grainy instead of smooth?
Graininess almost always comes from temperature shock. If the melted chocolate is too hot when it hits the cold whipped cream, the cocoa butter solidifies into tiny lumps. Let the chocolate-cream mixture cool for two full minutes after melting — it should feel warm, not hot. Also, make sure your heavy cream isn't ice-cold when you start whipping; take it straight from the fridge but don't chill the bowl beyond that.
One last note: if you find yourself making this as often as I do, it's worth bookmarking the steps. The ratio — 4 ounces chocolate to 1 cup cream, divided — scales up or down cleanly for any crowd. I've made a triple batch in a stand mixer for a birthday party and portioned it into shot glasses for a tasting menu. Same five minutes, same clean spoon.